Tag: how to

  • iPod Video to iPod Touch (How To)

    iPod Video to iPod Touch (How To)Back in October, I had published a post on how to hack your ipod video to make it look like an ipod classic.

    Well, given that there’s been a new firmware release from the same group that published the Classic firmware I figured I may get to testing the new iPod Touch interface for the iPod video.

    Don’t go getting excited – it’s not going to turn your iPod video into a touchscreen interface, but it will give you a rather impressive new interface for your iPod video.

    Note that I had previously been using an early release of the iPod classic firmware, iTunes clearing that on me last night to install Apple’s 1.2.3 release for the 5G iPod, which I’ve overwritten with the new iPod Touch firmware release (built on 1.2.1).

    Update: Almost 12 months on, I’ve stopped using my own video iPod and haven’t attempted this upgrade since I first made the post, I’m now happily using an actual iPod Touch. Note that as with any software or firmware upgrades or installs, you also accept responsibility for your actions and following the steps. I can’t and won’t guarantee that it will work for you as it’s been a while since I attempted it myself. I don’t accept iPods via mail to change firmware and I don’t accept responsibility for your own iPod when you’re making changes.

    Remember, if you get stuck, you can do the iPod reset as outlined in the older post.

    Prepping For The Install

    As with the previous hack, you’ll need to get yourself a copy of of the latest version of iPodWizard. You’ll also need access to a windows machine (XP / Vista), the correct firmware version for your iPod (5G firmware | 5.5G firmware) and an iPod cable.

    How To Update Your iPod Video Firmware

    • Before plugging in your iPod access the main menu settings by going to Settings > Main Menu when you turn your iPod on. Make sure the only menus switched on are ‘Music’, ‘Photos’, ‘Videos’ and ‘Extras’, everything else can be switched off. This will ensure there are no broken links or errors in navigating your iPod from the main screen.
    • Connect iPod to PC (iPod Wizard is windows based). If iTunes opens on connecting, you’ll need to close it and make sure that nothing else is accessing your iPod at the time. If connected properly, you will see the ‘Do Not Disconnect’ warning on your iPod screen.
    • Browse (via My Computer) to your downloaded firmware and if zipped, unzip it to a new folder. I named my folder 5G iPod Touch Hack.
    • In iPod Wizard, set your edit mode (top left corner) to ‘Firmware File’.
    • Click the ‘Open Firmware’ button and navigate to your ‘5G iPod Touch Hack’ folder and open the ‘TouchHack2.0’ file (Windows displays the default icon if no filetype associated, it has a .bin extension). Once loaded, the firmware’s version name will appear beside the ‘open firmware button’.
    • Click ‘Write To iPod’ to start copying the firmware onto your iPod. This doesn’t have any impact on your music collection, everything remains intact. The write process can take anywhere from 30 seconds to 2 minutes.
    • Once written, press ‘Eject’ in iPod Wizard. You should hear the Windows sound (if your speakers are on) for the removable drive disconnecting. DON’T unplug your iPod. Your iPod will restart and begin loading the new firmware for the first time.
    • When your iPod has fully restarted, press ‘Eject’ again in iPod Wizard. This will disconnect your iPod from your PC at which time you can remove the cable and start exploring your new interface.

    Before & After Images

    iPod Touch Hack - Click for more images

    A full range of images can be found here on Flickr.

    The firmware update was released by DrivenDesign.

  • iPod Hack – iPod Video becomes iPod Classic (How To)

    iPod Hack – iPod Video becomes iPod Classic (How To)

    Arriving via StumbleUpon? Why not subscribe to the blog or leave a comment if this article helped?

    Update: Updated on February 29th 2008 with latest versions of firmware (1.2.2 version at time of press). See main site here.

    After picking up on a new firmware release for the iPod Video (both 5G and 5.5g), I’ve gone and replaced the original firmware on my iPod to that resembling the iPod Classic. (via)

    The ‘Before’ images…

    Original iPod interface Original interface (menu)

    What you’ll need…

    • Latest version of iPod Wizard
    • Access to a Windows machine (no Mac version at present)
    • Firmware for your video iPod (5G Version or 5.5G Version). I’m on the 5G version, no search feature and it’s the 60GB model. If you’re on the slim 30gb / 80gb model and/or have the search feature then it’s likely you’re a 5.5G model but be sure! See my warning note below.
    • iPod cable

    How to modify the iPod’s firmware…

    • Connect iPod to PC (iPod Wizard is windows based). If iTunes opens on connecting, you’ll need to close it and make sure that nothing else is accessing your iPod at the time. If connected properly, you will see the ‘Do Not Disconnect’ warning on your iPod screen.
    • Open up your copy of iPod Wizard (it doesn’t require installation, but does need to be unzipped to a folder).
    • Browse (via My Computer) to your downloaded firmware and if zipped, unzip it to a new folder. Unzipping should create a folder called ‘Classic Firmware for 5G v1.0’ (depending on what firmware version you downloaded).
    • In iPod Wizard, set your edit mode (top left corner) to ‘Firmware File’.
    • Click the ‘Open Firmware’ button and navigate to your ‘Classic Firmware…’ folder and open the ‘Classic Firmware…’ file (Windows displays the default icon if no filetype associated). Once loaded, the firmware’s version name will appear beside the ‘open firmware button’.
    • In the ‘Firmware Information’ box, press ‘Write To iPod’ (top left). The writing process may take 2-3 minutes.
    • When finished, you need to eject your iPod safely from your computer – whether via the ‘Safely Remove Hardware’ icon in your system tray of via My Computer (right click on your iPod and press ‘Eject’. Ejecting the iPod will restart the iPod automatically, booting with the new firmware.

    The ‘After’ images…

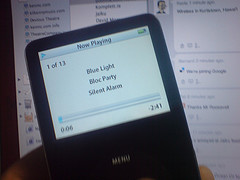
    Now playing (track view)Now playing
    iPod Interface (Video now playing)iPod Comparison

    See full photoset here

    Feedback

    I hadn’t seen the interface on the iPod classic before today but really like the split screen approach. I don’t feel anything is lost by adding the firmware. Navigating through the menu system is quick, though the slide from left to right could be a lot smoother (or instant). The new fonts are bigger, smoother, clearer though the fonts in the title bar look a fraction distorted (menus are fine).

    I also realised through the new interface that I really need to update my album artwork across the majority of recent additions to my iPod. Also, it’s worth going through the iPodWizard forums if you’re up for a bit of hacking!

    Warning (a.k.a How Not To Update Your iPod)

    Adding this firmware does not erase the contents on your iPod. BUT – make sure you’re using the correct firmware version for your iPod. The wrong firmware on your iPod will leave it in the infinite loop mode (as I did with Aidan’s). To get around this you need to restore your iPod to it’s original settings, effectively wiping whatever music is on your iPod. Resyncing with your library will restore your music.

    To restore your iPod you must hold the middle button (centre of wheel) and ‘Play’ at the same time, forcing the iPod into Disk Mode (like safe mode for all the world). Reconnect your iPod to your computer and pop open iTunes, the iTunes software automatically recognising the iPod needs to be restored. The restoration process takes 1-2 minutes.